Auto read more functions automatically shorten your post and create a thumbnail of an image which is present in the post.It also helps to load page faster.It also shows and image thumbnails which helps to attract the readers.I have also added the auto read more to my blog.You just have to add two codes to blog no need jquery or css.Now lets see how to add auto read more with thumbnails for blogger.

How To Add Auto Read More With Thumbnails For Blogger ?

  • Go to Blogger Dashboard > Design > Edit HTML.
  • Now find </head> tag
  • Place below code just before/above </head> tag.
<script type='text/javascript'>var thumbnail_mode = "no-float" ;
summary_noimg = 430;
summary_img = 340;
img_thumb_height = 100;
img_thumb_width = 120;
</script>
<script type='text/javascript'>
//<![CDATA[
function removeHtmlTag(strx,chop){
if(strx.indexOf("<")!=-1)
{
var s = strx.split("<");
for(var i=0;i<s.length;i++){
if(s[i].indexOf(">")!=-1){
s[i] = s[i].substring(s[i].indexOf(">")+1,s[i].length);
}
}
strx = s.join("");
}
chop = (chop < strx.length-1) ? chop : strx.length-2;
while(strx.charAt(chop-1)!=' ' && strx.indexOf(' ',chop)!=-1) chop++;
strx = strx.substring(0,chop-1);
return strx+'...';
}

function createSummaryAndThumb(pID){
var div = document.getElementById(pID);
var imgtag = "";
var img = div.getElementsByTagName("img");
var summ = summary_noimg;
if(img.length>=1) {
imgtag = '<span style="float:left; padding:0px 10px 5px 0px;"><img src="'+img[0].src+'" width="'+img_thumb_width+'px" height="'+img_thumb_height+'px"/></span>';
summ = summary_img;
}

var summary = imgtag + '<div>' + removeHtmlTag(div.innerHTML,summ) + '</div>';
div.innerHTML = summary;
}

//]]>
</script>

If you want to change image thumbnail size then find these numbers 100 and  120.

  • Now find   <data:post.body/>  and replace it with below code.
<b:if cond='data:blog.pageType == "item"'>
<data:post.body/>
<b:else/>
<b:if cond='data:blog.pageType == "static_page"'>
<data:post.body/>
<b:else/>
<div expr:id='"summary" + data:post.id'><data:post.body/></div>
<script type='text/javascript'> createSummaryAndThumb("summary<data:post.id/>");
</script>
<a class='more' expr:href='data:post.url'>Read more ...</a>
</b:if>
</b:if>


Now save it.
If it doesn't works for you then mention it in comments.I'll glad to help you...
  1. Go to Template > Edit HTML.
  2. Back up your template.
  3. Tick the Expand Widget Templates checkbox on top right of the code window.
Next, locate the first instance of <data:post.body/> tag and paste the following code immediately above it:


Note: 


  • Pin It button will only appear on post pages. We place this limit because the button only pins the page on which it appears. As such on homepage (if we were to allow it there), every instance of the button will pin the homepage, not the post (as it’s “supposed” to).
  • The Pinterest script in line 45 must occur only once in your blog. Omit this line if you’ve already had the script in your blog.
  • Buttons positioning To position the buttons at the bottom of post, place the code below (instead of above) <data:post.body/>.
  • Preview before saving.
  • Enjoy!

    Sharing is a most important thing which increases the traffic on your blog. By adding share this to every blogger posts increases the beauty of your posts. Today I am going to tell you how to add share this to every blogger posts wich includes facebook share,Twitter tweet it with Delicious Button.Installation of this widget is extremely easy so that you can add it very easily.

    Installation - 
    1) Go to Blogger Dashboard > Design > Edit HTML.
    2) Then Find By Using Ctrl+F

    <div class='post-footer'>
    3) If you get 2 results then search for 1st one and paste below code just below/after it.
    <!-- Sharing Button Code BEGIN -->
    <span class='st_facebook_hcount' displayText='Facebook'></span><span class='st_twitter_hcount' displayText='Tweet'></span><span class='st_delicious_hcount' displayText='Delicious'></span><span class='st_sharethis_hcount' displayText='ShareThis'></span>
    <script type="text/javascript">var switchTo5x=false;</script><script type="text/javascript" src="http://w.sharethis.com/button/buttons.js"></script><script type="text/javascript">stLight.options({publisher:'f3e22f37-f1d3-41f4-adfe-e9667347c91e'});</script>
    <!-- Sharing Button Code END -->
    4) Now save your template and refresh your blog posts.
    * If you are getting problem while installing the widget mention it in comments.
    Hope all of you like this widget :)


    Blogger provide an awesome tool for customizing a template called a Blogger Template Designer. Using Blogger Template Designer you can change the font style, color,width of template, background of template. Blogger Template Designer provide an easy way customizing template if you added interface into template for Blogger Template Designer. In this post I'm telling how to add interface for Blogger Template Designer in your custom template.
    Let us start,
    Interface with Blogger Template Designer is created with the help of the variables. Variables are used to store some values like color, font family, font size, background image URL. Those values are used into CSS for applying look and feel for template.


    This variable are defined between
    <b:skin><![CDATA[ and
    ]]></b:skin> How to Define Variables
    Syntax of defining variable is
    <Variable name="post.title.font" description="Font" type="font" default="normal normal 22px Arial, Tahoma, Helvetica, FreeSans, sans-serif" value="normal normal 24px Georgia, Utopia, 'Palatino Linotype', Palatino, serif"/> Lets look in details
    • name is variable name, which is unique name, used to access variable into CSS.
    • description used to identify variable into Blogger Template Designer.
    • Using type, Blogger Template Designer decide which type of interface is provide for customizing variable. You can use font, color or any custom string.
      1. Template designer provide the following type of box for changing font value.

      2. For color,

    • default is default value which is unchangeable, this is used to reset the value of that variable.
    • value is current value.
    Values for color is display HEX_Color_Code format and font in Font_Shorthand format.
    Syntax for Font_Shorthand format,
    <font-style> <font-variant> <font-weight> <font-size> / <line-height> <fontfamily>
    Where font-size and font-family is required, for other used their default value if missing.

    Grouping Variables
    Grouping variables is make also user friendly interface with template designer. By grouping you can access multiple properties for that element at one place. For example for post title you can group post title color and post title font together. Another example grouping together link color, visited link color and hover link color under the link.
    Syntax for Group,
    <Group description="Group Title" selector="h1">
    ....
    <!--Variable here-->
    ....
    </Group> 
    Where,
    • description is name of group title, used to categories variable in blogger template designer.
    • selector mention that which part is selecting from blogger template while this group is selected for editing. It is useful, when someone editing template via designer, it shows to user which part of template being edited.
    Example,
    <Group description="Blog Title" selector=".header h1">
         <Variable name="header.font" description="Font" type="font" default="normal normal 60px Arial, Tahoma, Helvetica, FreeSans, sans-serif" value="normal normal 48px Georgia, Utopia, 'Palatino Linotype', Palatino, serif"/>
         <Variable name="header.text.color" description="Title Color" type="color" default="#3399bb"  value="#ffffff"/>
    </Group>
    Above code is the group of  font and color for blog title, having description "Blog Title" and selector is h1 tag inside class header. So when you select Blog Title for editing in template designer then where h1 tag under header class is highlighted. Type of variable provide a particular interface for editing values, here variable header.font having type font with description Font and variable header.text.color having type color with description Title Color. When you see this in template designer look like as,


    How to use in CSS
    In general, we are using css like this.
    .header h1{
        font-family:Verdana, Geneva, sans-serif;
        font-size:12px;
        font-style:italic;
        font-weight:bold;
        
        color:#00C;    
    }
    If you want to use an variable in CSS, use variable instead of value closed inside $( ). See following code.
    .header h1{     font:$(header.font);        color:$(header.text.color); }
    In this type value for font and color is taken from variable.

    Example,
    <?xml ... ?>
    <html ....>
    <head>
    <b:skin>
    <![CDATA[
    /* Variable Defination       
    <Group description="Links" selector=".main-outer">
        <Variable name="link.color" description="Link Color" type="color" default="#2288bb" value="#c4005b"/>
        <Variable name="link.visited.color" description="Visited Color" type="color" default="#888888" value="#909090"/>
        <Variable name="link.hover.color" description="Hover Color" type="color" default="#33aaff" value="#ff13b8"/>
    </Group>
    */
    a:link {
      text-decoration:none;
      color: $(link.color);
    }
    
    a:visited {
      text-decoration:none;
      color: $(link.visited.color);
    }
    
    a:hover {
      text-decoration:underline;
      color: $(link.hover.color);
    }
    ]]>
    </b:skin>
    </head>
    <body>
    ....
    </body>
    </html> 
    You can also use one variable value to define another variable so that  changing the one variable value will reflect effect on all template.

    Width of Blog and Sidebar
    In template <b:skin></b:skin> used for enclosing an CSS, same as <b:template-skin> and </b:template-skin> is used to enclosed length factor of template means width of template, sidebar.
    In this, variable syntax is same but type of variable is length.
    <b:variable default='960px'  name='content.width' type='length' value='990px'/>     
    <b:variable default='310px' name='main.column.right.width' type='length' value='340px'/> 
    

    Example,
    <b:template-skin>
      <b:variable default='960px'  name='content.width' type='length' value='990px'/>
      <b:variable default='310px' name='main.column.right.width' type='length' value='340px'/>
      <![CDATA[ body {
        min-width: $(content.width);
        }
        .main-inner .columns {       
        padding-right: $(main.column.right.width);
        }
        .main-inner .fauxcolumn-right-outer {
        width: $(main.column.right.width);
        } ]]>
    </b:template-skin>
    I hope this post will help you. If any problem or suggestion leave commen.
    Facebook comment for your blog can serve as a good way to make your site more engaging and encourage readers to drop comments if they’re already logged in to Facebook. It also serves as a source of traffic since using Facebook comment shares the comment and post page on the visitor’s Facebook wall.

    1. Creating a Facebook Application

    i. Head on to facebook developer page, you should create a new app by clicking the button at the top right 

     ii. Enter your application name and namespace,input the captcha code and proceed.

     iii. On the next page, enter your custom domain name (if you’re using a custom domain) or just blogspot.com (if you’re using blogspot sub domain) in the space provided for App domain.

     iv. Scroll down a bit and hit the Save Changes button. Now you’re done with creating your facebook application but there’s one more thing to do. On that same page, you should see your application ID. Copy it and save somewhere, you’re gonna be needing it.


    2. Adding the codes to your template


    We’re adding four sets of codes into your template to make this work the way we want, aight?
    i. xmnls attribute
    ii. SDK script
    iiI. Open graph meta tag
    iv. Comment form iframe code
    Log in to your blogger account and click on Template > Edit HTML > Check Expand Widget Template
    i. Press Ctrl + F and search for this code:

    <html

    This should be found on the second or third line of your template.
    - Right in front of this, add the following code:

    xmlns:fb='http://www.facebook.com/2008/fbml'

    -Be sure to have a space before and after this code. Take a look at the example below:

    <html xmlns:fb='http://www.facebook.com/2008/fbml' expr:dir='data:blog…………..2005/gml/expr' >

    ii. Press CTRL + F on your keyboard and search for this:

    <body

    If you can’t find this, search for something similar. You should search for this instead:

     <body expr:class='&quot;loading&quot; + data:blog.mobileClass'>

    In the next line, paste this code:

    <div id="fb-root"></div>
    <script>
    window.fbAsyncInit = function() {
    FB.init({
    appId : 'YOUR APPLICATION ID HERE',
    status : true, // check login status
    cookie : true, // enable cookies to allow the server to access the session
    xfbml : true // parse XFBML
    });
    };
    (function() {
    var e = document.createElement('script');
    e.src = document.location.protocol + '//connect.facebook.net/en_US/all.js';
    e.async = true;
    document.getElementById('fb-root').appendChild(e);
    }());
    </script>

    Be sure to replace YOUR APPLICATION ID HERE with the application ID I asked you to copy earlier, remember?
    iii. Now, let’s add the open graph meta tag. Search for this code in your template:

    iii. Now, let’s add the open graph meta tag. Search for this code in your template:

    </head>

    In the line above it, paste this piece of code:

    <meta property="fb:app_id" content="YOUR_APP_ID" />

    Replace YOUR_APP_ID with that same application ID you previously copied.
    iv. Now here’s the last part of tweaking your template your template to make it display Facebook comment box. The last thing is the iframe to display the comment box where you want. Search for this in your template:

    <data:post.body/>

    If you’re using a magazine style template, you’re likely to have more than one occurrence of this. Using the wrong one won’t make the comment show up. If you’re not sure about which one to use, search for this instead:

    <div class='post-footer-line post-footer-line-1'>

    In the line just below it, paste this code:

    <b:if cond='data:blog.pageType == &quot;item&quot;'>
    <style>
    .doncaprio-share-buttons
    {
    -webkit-border-radius: 5px;
    -moz-border-radius: 5px;
    border-radius: 5px;
    border:1px solid #BBBBBB;
    background-color:#F2F2F2;
    -webkit-box-shadow: #B3B3B3 5px 5px 5px;
    -moz-box-shadow: #B3B3B3 5px 5px 5px;
    box-shadow: #B3B3B3 5px 5px 5px;
    padding: 5px;
    margin: 10px;
    }
    </style>
    <p align='center'>
    <div align='center' class='doncaprio-share-buttons' style='background: #f2f2f2;'>
    <font size='6'><strong>Love to hear what you think!</strong></font> <img src='http://www.doncaprio.com/wp-content/uploads/2012/08/comment.png'/>
    <br/>
    <script src='http://connect.facebook.net/en_US/all.js#xfbml=1'/>
    <div><fb:comments expr:href='data:post.url' expr:title='data:post.title' expr:xid='data:post.id' width='450'/></div><div align='right'><a href='http://www.doncaprio.com/2012/08/new-facebook-comment-box-for-blogger-with-notifications-enabled-2.html' target='blank'><small>[Facebook Comment For Blogger]</small></a></div></div></p></b:if>

    Save your template, the Facebook comment form should now appear. If it looks rather small, replace width=’450′ with width=’600′. This increases the width from 450px to 600px.


    Note - This tutorial is also answer to How to get alexa page ranks for blogger or website ?


    Alexa is the global leader in Analytics.It is also leading provider of free, global web metrics. Search Alexa to discover the most successful sites on the web by keyword, category, or country. Use our analytics for competitive analysis, benchmarking, market research, or business development. You can also use Alexa's Pro tools to optimize your blog's presence on the web.Alexa also helps to determine your blog improvement through it charts.I also add this blog to alexa and now page rank of btsnts is 17,64,265 and it is improving day to day.


    How To Get Alexa Page Rank For Your Blog ?


    I am giving a full image tutorial so that you can easily understand it


    • Fill  the short form.


    • Now go to your inbox and search for confirmation message from alexa and click on provided link.

    • Now you will redirect to password page.Type the password for two times and hit submit password.


    • Now fill about your profile then hit update the profile.


    • Now go to your Dashboard at left site.


    • Click Add A Site Button at right bottom.


    • Now select your plan.I recommend Free Plan.


    • Now enter your blog/websites URL.


    • Then copy the full code carefully.


    • Now open a new tab.
    • Go to Blogger Dashboard >  Design > Edit HTML.
    • Now find <head> tag.
    • Put the copied code just below or after <head> tag.
    • Then again goes to alexa and hit Verify my ID button.
    You done it.
    You can also check your pagerank @

    http://www.alexa.com/siteinfo/YOUR BLOG/SITE URL. 

    *Not need to wright WWW. or HTTP://
    Meta tags are very important element of Search Engine Optimization (SEO). Meta descriptions and Meta keywords play a big role on OnSite SEO to get higher ranking in search engine result page (SERP).
    Few days ago there was a big problem for writer who used Google’s blogger platform for blogging. Because there was no easy way to add Meta description in blog posts. But Blogger platform has now  been updated and now we can easily add Meta description in every blog posts we want.
    Let’s see How to add Meta description to blogger blog posts
    •  Login to your blogger account.
    • Go to Setting > Search preferences.

    • Then click on Edit link in Meta tags > Description.

    • Select "Yes" option and write description for your Homepage and click on save.


     Now click New Posts. See the screenshot below.
    How to add Meta description to blogger
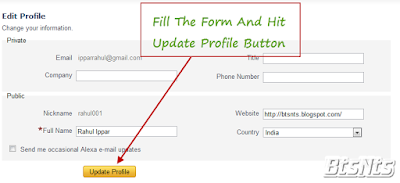
2. Now input your unique title and content with necessary images and videos. Write the content focusing your researched keyword and targeting audience.
    3. Now it’s time to add Meta description in your blog post that will show in SERP. Please click on Search Description from right side and input your 160 words Meta description. Remember, it should be under 160 words, because search engine only show 160 words in the SERP.
    It will help you to get more value to Google and audience will easily understand what the article is about. Please see the screenshot below to get crystal clear instruction.
    How to add Meta description to blogger