Showing posts with label Blogger Widgets. Show all posts


In order to keeping busy visitors on our blogs finally we got the plugin which we have been waiting from long time,recently facebook has launched their "Recommendation Bar" in beta version,the Recommendation Bar is a plugin which shows a number of some recommended articles for your readers or visitors and you can set number of recommended articles,when any visitor visits to your any post,after some specific time the plugin pop ups at the right/left corner of your blog with the recommended articles,thats why its helps you to keep busy your visitors on your blog.The plugin contains title of your post,thumbnail and number of likes just below of that post and the plugin shows the only those articles which are previously liked or shared on facebook.If you want more such plugins then I am listing some similar widgets and plugins -

Now lets see how to add facebook recommendations bar to blogger?

How To Add Facebook Recommendations Bar To Blogger?


For better understanding I am dividing this post in two parts and they are as below,


  1. Creating new Facebook App
  2. Adding Facebook Recommendations Bar To Blogger

Part 1 : Creating new Facebook App

To create Facebook app for your Recommendation Bar follow below steps,
  • First go to Facebook Apps and login with your Facebook account
  • Click on Create New App button at top right corner

  • As soon as you hit Create New App button a pop up box will appear.In App Name field fill Recommend Bar and keep all it is and hit Continue button.
Click On Image To Enlarge

  • Enter the captcha as shown in image and hit Submit button

  • Now you will redirect to an another page.Scroll down and click on Website with Facebook Login tab and inside the box input your blog URL.Now leave all fields as it is and click Save Changes
Click On Image To Enlarge


  • Now copy your App ID and paste it into notepad,we will need it later.


Great,you have created your App.Now lets see how to add Recommendations Bar to blogger.

Part 2 : Adding Facebook Recommendations Bar To Blogger


  1. Go to Blogger Dashboard > Template
  2. Download a copy of your template
  3. Click on Edit HTML
  4. Hit Proceed button
  5. Now search for below code in your template


<html

replace it with below code,
<html xmlns:fb='http://ogp.me/ns/fb#'


Now find for below code,
<body>


just below of it paste following code,

Note - If you are using default blogger templates then search for <body tag instead of above code.
<div id='fb-root'/> 
<script>
//Facebook Recommendation bar by http://fastbloggerhack.blogspot.com/
//this notice must stay intact for legal use
//For more visit http://
fastbloggerhack.blogspot.com/
//<![CDATA[
(function(d, s, id) {
var js, fjs = d.getElementsByTagName(s)[0];
if (d.getElementById(id)) return;
js = d.createElement(s); js.id = id;
js.src = "//connect.facebook.net/en_US/all.js#xfbml=1&appId=YOUR APP ID HERE";
fjs.parentNode.insertBefore(js, fjs);
}(document, 'script', 'facebook-jssdk'));
//]]>
</script>
<b:if cond='data:blog.pageType == &quot;item&quot;'><b:if cond='data:blog.pageType != &quot;static_page&quot;'><div style='z-index:999999; position:absolute;'>
<fb:recommendations-bar action='like' max_age='0' num_recommendations='3' read_time='10' side='right' site='http://
fastbloggerhack.blogspot.com/' trigger='40%'/></div>
</b:if></b:if>


  • Replace APP ID HERE with your APP ID which you have created in first part
  • Replace http://fastbloggerhack.blogspot.com/ with your blog URL.
  • The widget will only appear on post pages and not on homepage or static pages. To display it on all pages, then simply delete the lines in red color.
  • If you want to change number of recommendations then simply change the value 3
  • If you don't want to show your old articles then edit the value max_age='0',you can set it to 1-180.But if you don't want to take age into account then let it be 0 as default.
  • If you want to change position of bar to right to left then simply replace right with left. 
  • When any visitor comes to your blog,after specific time the bar expand.I have set the time to 10 seconds to chnage it just change value 10.
Finally save your template and visit your post pages.
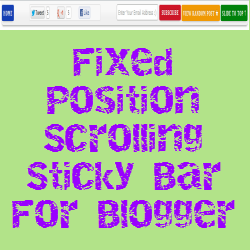

Now days concept scrolling bar or sticky bar has becomes very popular because of their attention grabbing capacity,they quickly catches any ones attention on them that's why I am also using a sticky bar(hellobar) on my blog.Today I am gonna to share a cool scrolling sticky bar which contains many subscription/sharing options such as twitter tweet button,google +1 button,facebook like button,email subscription form also it contains a random post button which will redirect you to another(any random) post.This sticky will sticks to upper part of page and only visible when scroll down.Now lets get started and see how to add this sticky bar to blogger blog.To add to sticky bar I will recommend you to use old blogger user interface because as per widget author it throws an unexpected error,you can switch back to old blogger interface by clicking on the Settings Wheel icon at top right of your new blogger dashboard.

Click On Image To Enlarge

How To Add Scrolling Sticky Bar To Blogger?


Step 1 : Adding The HTML


  1. Go to Blogger Dashboard > Template
  2. Download a copy of your template
  3. Click on Edit HTML
  4. Hit Proceed
  5. Find for below code,
<body>


Note - If you are using default blogger templates then search for <body tag.Watch video below for exact information.

add below code just below of above code,
<div id='HB-Bar-Container'>
<div id='HB-Bar-Content'>
<ul id='HB-Bar-Left'>
<li class='Home'> <a href='http://fastbloggerhack.blogspot.com/'>Home</a> </li>
<li class='Share'> <div id='share-top'>
<ul>
<li> <a class='twitter-share-button' data-count='horizontal' href='http://twitter.com/share'>Tweet</a> </li>
<li> <g:plusone size='medium'></g:plusone> </li>
<li> <div class='fb-like' data-font='verdana' data-layout='button_count' data-send='false' data-show-faces='false'>
</div></li></ul>
<div style='clear:both;'></div></div></li>
</ul>
<ul id='HB-Bar-Right'>
<li class='Subscribe'> <div class='HB-email'>
<form action='http://feedburner.google.com/fb/a/mailverify' method='post' onsubmit='window.open(&#39;http://feedburner.google.com/fb/a/mailverify?uri=HBlogger&#39;, &#39;popupwindow&#39;, &#39;scrollbars=yes,width=550,height=520&#39;);return true' style='padding:3px;text-align:center;' target='popupwindow'>
<input class='textarea' gtbfieldid='3' name='email' onblur='if (this.value == "") {this.value = "";}' onfocus='if (this.value == "") {this.value = "";}' placeholder=' Enter Your Email Address :)' type='text' value=''/> <input name='uri' type='hidden' value='HBlogger'/><input name='loc' type='hidden' value='en_US'/> <input class='HB-emailsubmit' type='submit' value='Subscribe'/> </form>
<a href="http://fastbloggerhack.blaogspot.com/" title="Blogger Widgets" ><img src="http://img1.blogblog.com/img/blank.gif" /></a> </div></li>
<li class='btt'> <a href='#top' title='Back to top'>Slide to Top &#8593;</a> </li>
</ul></div></div>

  • Line No. 4 : Replace http://fastbloggerhack.blaogspot.com/ with your blog URL.
  • Line No. 16,16 : Replace HBlogger with your feedburner username.

Step 2 : Adding The Scripts


Now find for below code,
</body>


add below code just before/above it,
<script src='http://ajax.googleapis.com/ajax/libs/jquery/1/jquery.min.js' type='text/javascript'></script> 
<script>
//<![CDATA[
var b = $("#HB-Bar-Container");var c = b.css("top");$(window).scroll(function (){if ($(this).scrollTop() > 50){b.stop().animate({top: "0px"}, 0)}else{b.stop().animate({top: "-100px"}, 0)}});
//]]>
</script>
<script>
$(document).ready(function(){// fade in .btt
$(function () {$(window).scroll(function (){});// scroll body to 0px on click
$('.btt a').click(function () {$('body,html').animate({scrollTop: 0}, 350);return false;});});});
</script>
<script>(function(d, s, id) {var js, fjs = d.getElementsByTagName(s)[0];if (d.getElementById(id)) return;js = d.createElement(s); js.id = id;js.src = "//connect.facebook.net/en_US/all.js#xfbml=1";fjs.parentNode.insertBefore(js, fjs)}(document, 'script', 'facebook-jssdk'));</script>
<script src='http://apis.google.com/js/plusone.js' type='text/javascript'></script>
<script src='http://platform.twitter.com/widgets.js' type='text/javascript'></script>


Step 3 : Adding The Bar Styles


Now find for
]]></b:skin>

add below code just above it,
#HB-Bar-Container {
background-color:#f6f6f6;
background: -webkit-gradient(linear, 0% 40%, 0% 70%, from(#f9f9f9), to(#f1f1f1));
background: -moz-linear-gradient(linear, 0% 40%, 0% 70%, from(#f9f9f9), to(#f1f1f1));
}

#HB-Bar-Container , #HB-Bar-Left .Home a, #HB-Bar-Right .btt a,.HB-emailsubmit {
box-shadow: 0 5px 5px -5px #999;
-webkit-box-shadow: 0 5px 5px -5px #999;
-moz-box-shadow: 0 5px 5px -5px #999;
}

#HB-Bar-Container{
margin: 0px 116px;
top:-100px;
-moz-border-radius:0px 0px 10px 10px;
-webkit-border-radius:0px 0px 10px 10px;
border-radius: 0px 0px 10px 10px;
text-align:center;
border-bottom: 1px solid #aaa;
z-index:999;
padding:4px;
height:33px;
position:fixed;
vertical-align: baseline;
}

#HB-Bar-Container *{
padding:0;
}

#HB-Bar-Container a {
text-decoration:none;
}

#HB-Bar-Content{
width:1024px;
margin:0 auto;
}

#HB-Bar-Content li{
list-style:none;
float:left;
}

#HB-Bar-Left{
float:left;
width:45%;
}

#HB-Bar-Right{
float:right;
width55%;
}

#HB-Bar-Left li{
margin-right:1%;
margin-top:-7px;
}

#HB-Bar-Right li{
margin-top:-7px;
}

#HB-Bar-Left .Home a, #HB-Bar-Right .btt a,.HB-emailsubmit{
font-size:9pt;
font-family:cambria;
font-weight:Bold;
text-transform:uppercase;
color:#fff;
text-shadow:0 -1px 1px rgba(0,0,0,0.25);
letter-spacing: 1px;
padding:6px;
border-radius:3px;
-moz-border-radius:3px;
-webkit-border-radius:3px;
}

#HB-Bar-Left .Home a:active, #HB-Bar-Right .btt a:active,.HB-emailsubmit:active{
position: relative;
top: 1px;
box-shadow:none;
}

#HB-Bar-Left .Home a{
background:#143eb4;
}

#HB-Bar-Left .Home a:hover{
background:#1556fa;
}

#HB-Bar-Right .Subscribe{
margin-top:-14px;
}


#HB-Bar-Right .btt a{
background:#00810b;
margin-left:3px;
}

#HB-Bar-Right .btt a:hover{
background:#06b421;
}

.HB-emailsubmit{
background:#ce1527;
cursor:pointer;
border:none;
height:26px;
width:90px;
}
.HB-emailsubmit:hover{
background: #f02a37;
}
.textarea{
border:1px solid #aaaaaa;
-moz-border-radius:3px;
-webkit-border-radius:3px;
border-radius:3px;
resize:none;
font-size:8pt;
font-family:verdana;
width:170px;
height:25px;
color:#000000;
}

#share-top{
background: #f9f9f9;
border:1px solid #dddddd;
line-height: 1;
margin: -4px 0 0 60px;
padding: 10px 0 2px 5px;
-moz-border-radius:3px;
-webkit-border-radius:3px;
border-radius:3px;
}

#share-top li {
display: block;
margin-right: 0;
}

#facebook-widget,#google-widget,#twitter-widget {display:none; }
@media only screen and (min-width : 768px) and (max-width : 1050px),only screen and (min-device-width : 768px) and (max-device-width : 1024px){
#HB-Bar-Container{
display:none;
}
}

Finally save your template and visit your blog.


Today I am sharing an amazing slide out social sharing widget,when any user hovers on this widget it slide out with some social networking button such as twitter,facebook,print,email and add this button which contains share option for almost all social sharing sites.This widget floats to below right corner of the page and scrolls along with page which allow a real time sharing option for your visitors,this widget is created by addthis and bloggerized by us.Now lets go to the tutorial and see how to add this widget to blogger blog.


How To Add This Widget To Blogger?

The installation of this widget is damn easy,you can add this widget in two steps.

  1. Go to Blogger Dashboard > Template
  2. Click On Edit HTML
  3. Hit Proceed button
  4. Find For Below Code,

</head>


add below code just above it,
<script type="text/javascript" src="http://s7.addthis.com/js/300/addthis_widget.js"></script>


Now find for below code
</body>


add below code just before/above it,

<!-- fastbloggerhack.blogspot.com slideout widget : BEGIN -->
<div class="addthis_toolbox addthis_peekaboo_style addthis_default_style addthis_label_style addthis_32x32_style">
<a class="addthis_button_more">Share</a>
<ul>
<li><a class="addthis_button_preferred_1"></a></li>
<li><a class="addthis_button_preferred_2"></a></li>
<li><a class="addthis_button_preferred_3"></a></li>
<li><a class="addthis_button_preferred_4"></a></li>
</ul>
</div>
<!-- fastbloggerhack.blogspot.com slideout widget : END -->


Finally save your widget and you are done :)